1. Installation in Return Line
When the oil cooler is installed in the return line of a hydraulic system, there should be no pressure spikes. If this is not possible, an offline cooling system should be used.
2. Mounting
The Air Cooled Oil Cooler should be mounted on a solid flat surface. Mounting of the Air Cooled Oil Cooler is usually vertical by the means of mounting holes provided.
3. Place of Mounting
- The place of installation should be away from direct sunlight and rain water splash. Take care that the cooling air can flow in and out freely. Ensure that the heated air is not recirculated.
- A free space corresponding to a minimum of half the height of the matrix (A) should be available in front of and behind t oil cooler to allow for good air flow. Refer to figure below.
 4. Filter
It is advisable to install a filter or Y strainers in the inlet line of Air-Cooled Oil Cooler, especially where fluid contamination is suspected.

5. By-Pass Check Valve
Install a by-pass check valve of cracking pressure 4 or 5 bar in the inlet line.

6. Piping
If the inlet and outlet pipes are transmitting vibrations to the Air-Cooled Oil Cooler please replace them with low
pressure flexible hydraulic hoses and fitting. Check the internal diameter of pipeline, hoses and fittings to ensure that they are adequately sized.
| Oil Flow Range (LPM) |
25 | 25-50 | 50-75 | 75-100 | 100-150 | 150-200 | 200-250 | 250-300 | 300-350 | 350-400 |
|---|---|---|---|---|---|---|---|---|---|---|
| ID of Pipe (MM) |
13 | 15-19 | 19-23 | 22-27 | 24-33 | 29-38 | 32-42 | 36-46 | 39-40 | 42-53 |
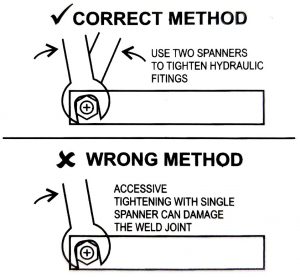
7. Fitting Tightening
Use two spanners to tighten hydraulic fittings. Excessive tightening with single spanner can permanently damage the weld joint.
Air Cooled Oil Cooler AW & AH Series Installation Guidelines
![]()